13 – The Central Jambs & Multipoint Lock
Step 13 – The Central Jambs & Multipoint Lock
There are a number of good reasons to have a multi-point-lock (MPL), especially on double doors. Because it secures at the top and bottom of the frame as well as at three points along the edge of the door, it ensures the door is forced properly closed. With doors that open inwards like these, when the wind blows it can be surprising how easily they will deflect at the top or bottom if unsupported. The multi-point helps prevent that and ensure a good weather seal. The MPL will also help keep the door straight in the long term, resisting any tendency of the wood to warp.
Now we are going to add some strips to the central jambs of both doors, and these will accommodate the the multi point locking system. The MPL itself should fit into the ‘active door’, this ought to be the one that you open and close the most. It will have the door handle and lock on it and close onto the ‘passive door’, which will be the one fitted with ‘the keeps’ (the bits the bolts fit into). After a load of head scratching, measuring and marking, we can get busy with the router and make a full length grove for the MPL. It was 18mm wide, so required a few passes with my 10mm router bit.

Now we need to rough out most of the material around where the MPL’s locking mechanisms and bolts go. The modded pillar drill’s just the ticket, and always makes me smile.

Once that is done, tidy up with the router of a good old mallet and chisel – I used both – the chisel was needed for the deeper bits.

Finnish off the MPL’s new house by accommodating the full range of its moving undulations – more routing.

With that done, now’s the time to turn over this bit and make the holes for the door handle spindle (the square bar that attaches to the door handle and operates the latch), and the lock cylinder. Incidentally, most MPLs don’t come with a lock cylinder – because there are many different sizes to choose from, depending upon the width of your door. I purchased the longest cylinder I could find anywhere, and it was still a touch short for these monster doors.

The advantage of doing this now, rather than later is that we can use the pillar drill, making it much easier to make the large holes accurate. Taking a rubbing of the lock can help you position things. Once you have drilled one of the holes, mount the lock in the door, insert the spindle, and you can then mark up the wood, or drill through the paper (sticking it on may help).

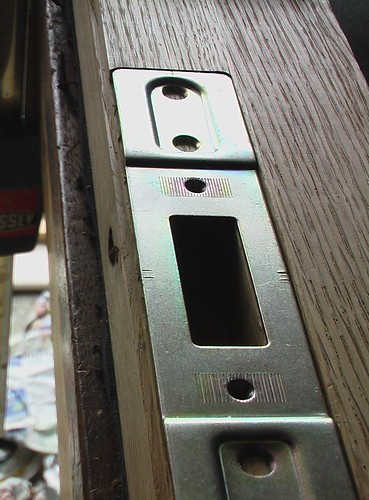
That done and more or less ‘working’ we can move onto the passive door’s keeps. The central keep has two sections, one retainer for the deadbolt and one for the latch.

The keeps are adjustable, which is quite a good feature. Below shows the keep housing bedded in, without the adjustable section fitted.

This door is so wide! I am going to need to make a custom strike plate – never mind, a chance to upgrade to some nicer stainless steel ;) More on that in a bit, for now let’s add some insulation, reduce the weight a bit, and glue these central jambs into the doors.
